To efficiently run Fluent classic on the Nimbix platform without using the Workbench interface, the following steps can be undertaken. Running stand-alone fluent will allow the user to take full advantage of the CFD solver without the burden of GUI that Workbench employs. For medium to large projects, the jobs run in stand-alone Fluent are more efficient and can take advantage of the Nimbix full computational power.
1. Select the desired FLUENT release from the Compute dashboard.
2. A splash window will open and select the “Fluent” menu.
3. Select “FLUENT” from the list highlighted bars colored in ink. When clicking on FLUENT icon/bar, the FLUENT Interactive Window opens, and you are ready to select the machine type, number of cores, etc.
UNDER GENERAL TAB
4. Select Machine Type
Under "Machine Type" drop down, when clicked, you have the choice of selecting the type of machine you want to run the job on. The decision of which machine type to select is based on how big and complex your model is and cost (some machines will have higher RAM, others will only run the job on single CPU, others will have better graphics and therefore higher cost, etc)
For example, select 20 Core Intel Skylake, as shown below:

5. Assign the number of cores
The machine type you selected in the previous step, will dictate the increment in the number of cores that you can select. You can leave default selection, which in this case would be “20” or move the scroll bar to the desired number of cores or simply type over “20” the number of cores you wish to run your job on (“40” in this case):

Before submitting your job for running, you can preview your settings under the PREVIEW SUBMISSION tab.
NOTE: If you have a geometry ready to be Imported for meshing in Fluent (the geometry should be a Fluent compatible geometry that was transferred via FileZilla in your “data” folder), then instead of clicking the button SUBMIT, which will submit your job and launch the FLUENT SOLVER, check (by clicking) “Meshing Mode” as shown below:

Keep the default MPI or chose the platform that the “Machine Type” uses. Fluent uses the file machines.txt located in the folder /home/nimbix/MACHINES.TXT. This is how Fluent knows what nodes are available and how to scale the job across nodes.
This will launch your FLUENT in meshing mode and will allow you to import a geometry.
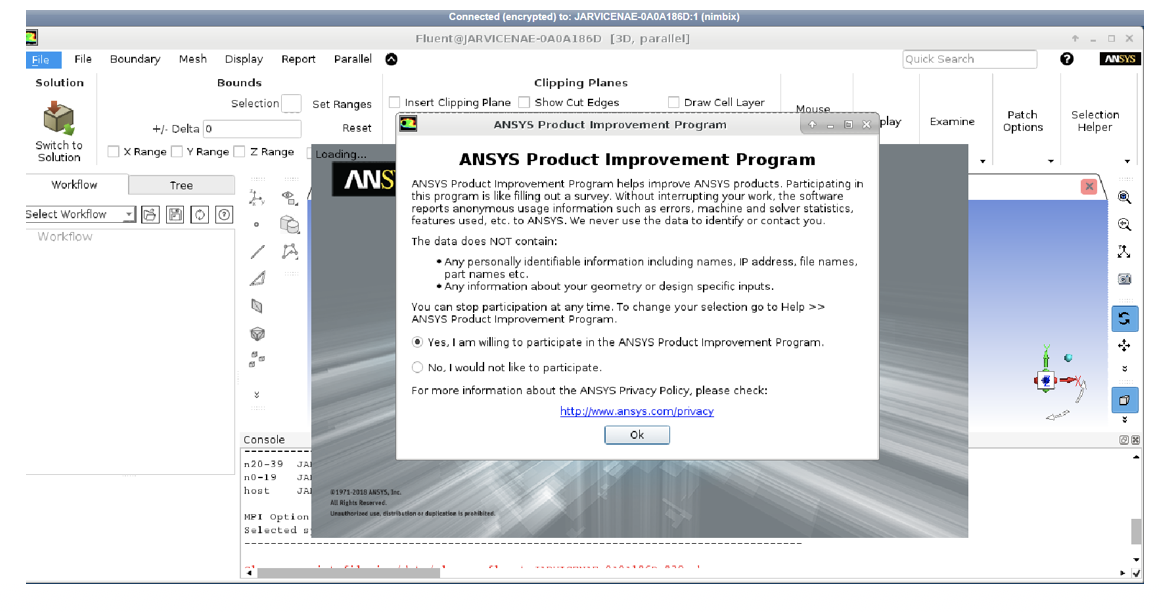
You can click OK if you wish to participate in ANSYS Product Improvement Program (you can select here Yes or No, it doesn’t really matter).
FLUENT MESHING
1. Under WORKFLOW TAB, select WATERTIGHT (if you know you have a fault free geometry) as shown below:

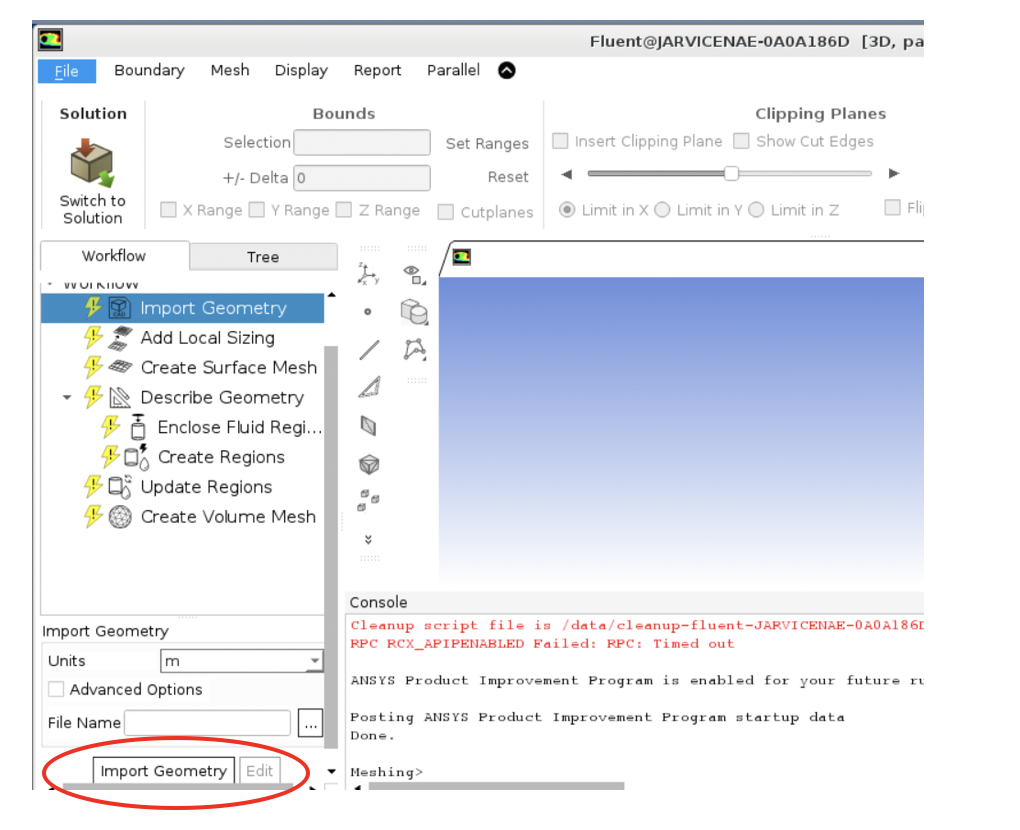
2. Import your geometry, by clicking the TAB, Import Geometry (be sure to select the units from under Units, to match the units the geometry was created in)
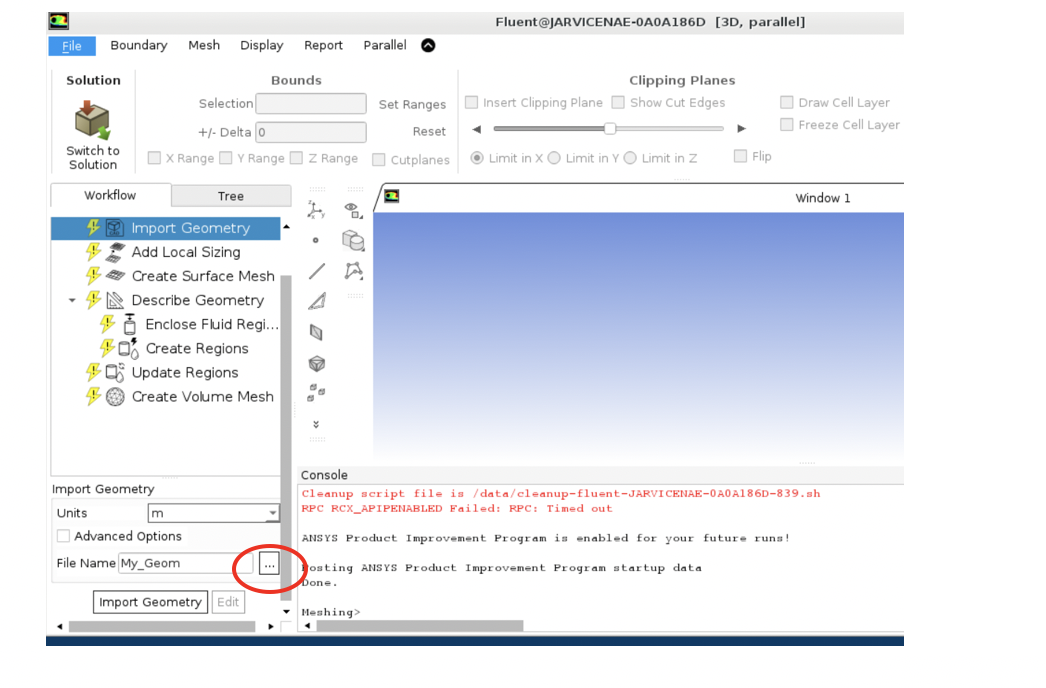
3. Give a name Under the “File Name”. For example, “My_Geom” and click on the “…” next to the File Name
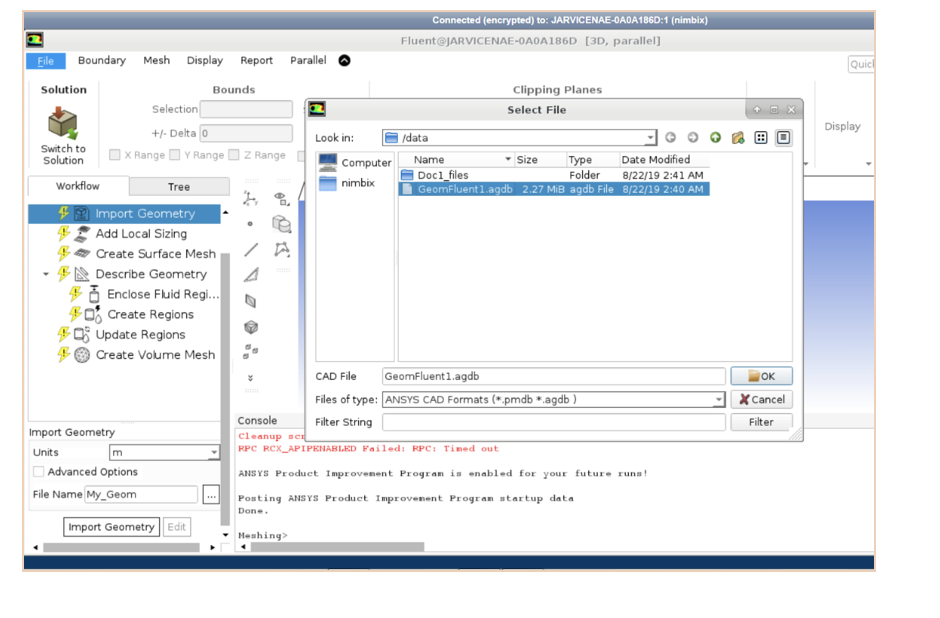
4. A Window will launch where you will need to search for the “data” directory and the Folder where your geometry was saved:
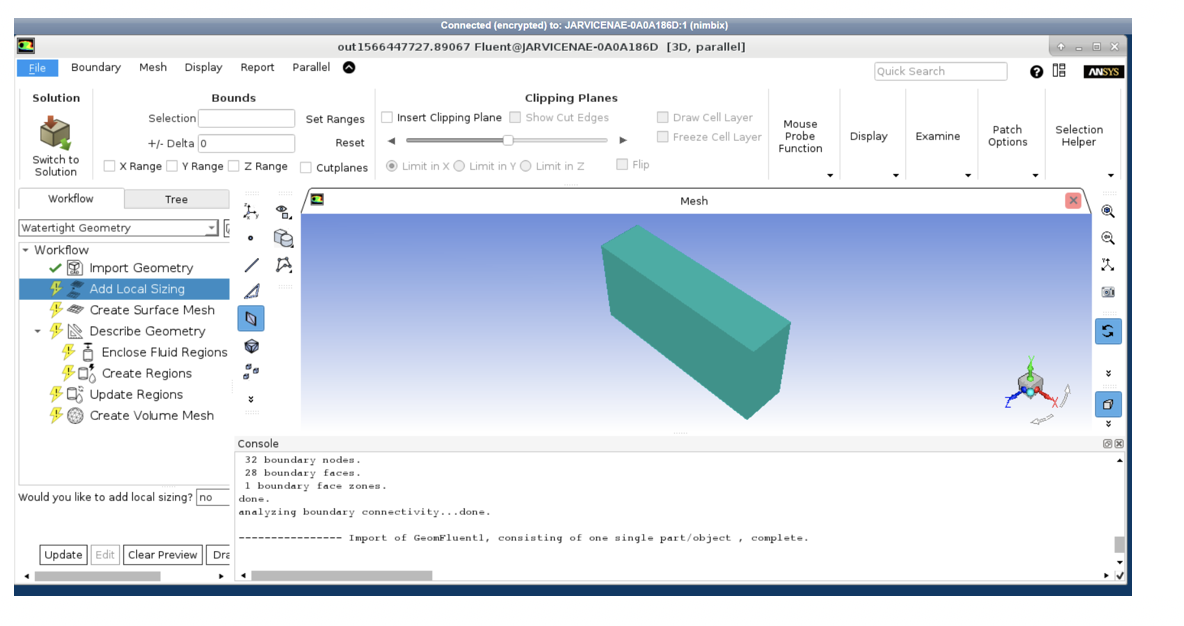
5. Your geometry is now Imported and you are ready to perform the mesh operation using Fluent Advanced Mesher
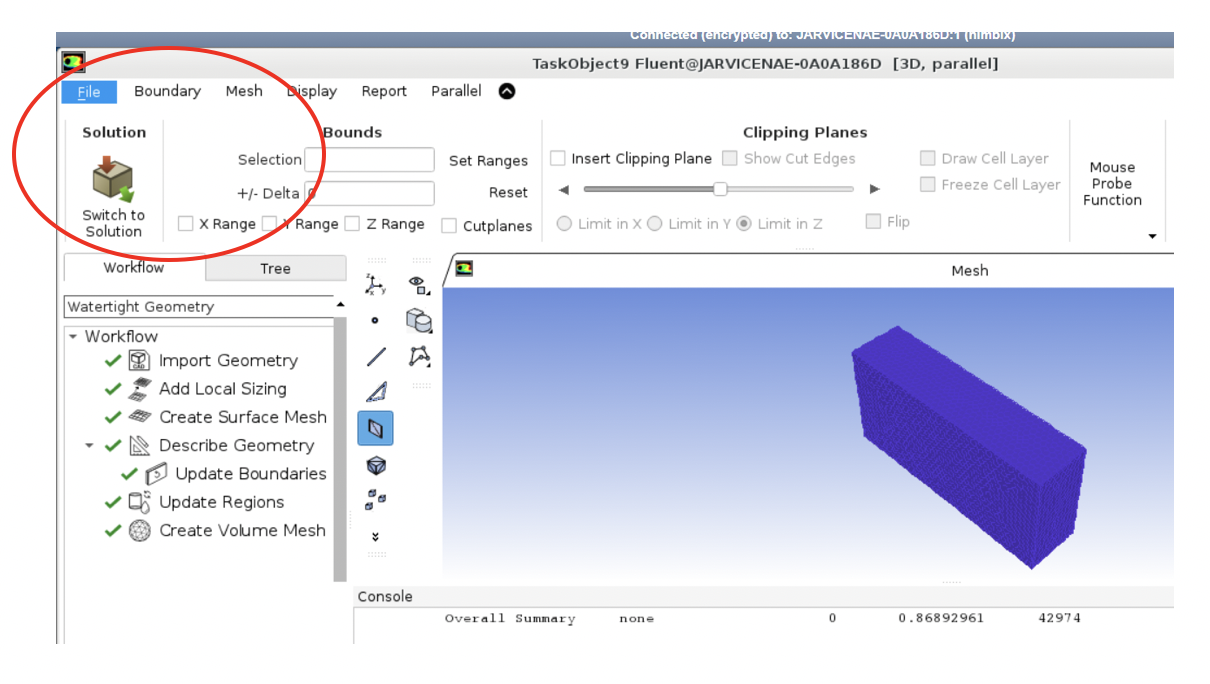
6. Once you performed the Mesh Operation and all the “yellow” tabs in the Workflow are green checked (as shown in the tree below), you are ready to Switch to Fluent Solver Mode by clicking on “Switch to Solution” tab:
FLUENT SOLVER
1. To check the number of cores allocated for this job, click on CPU Info under the PARALLEL TAB:
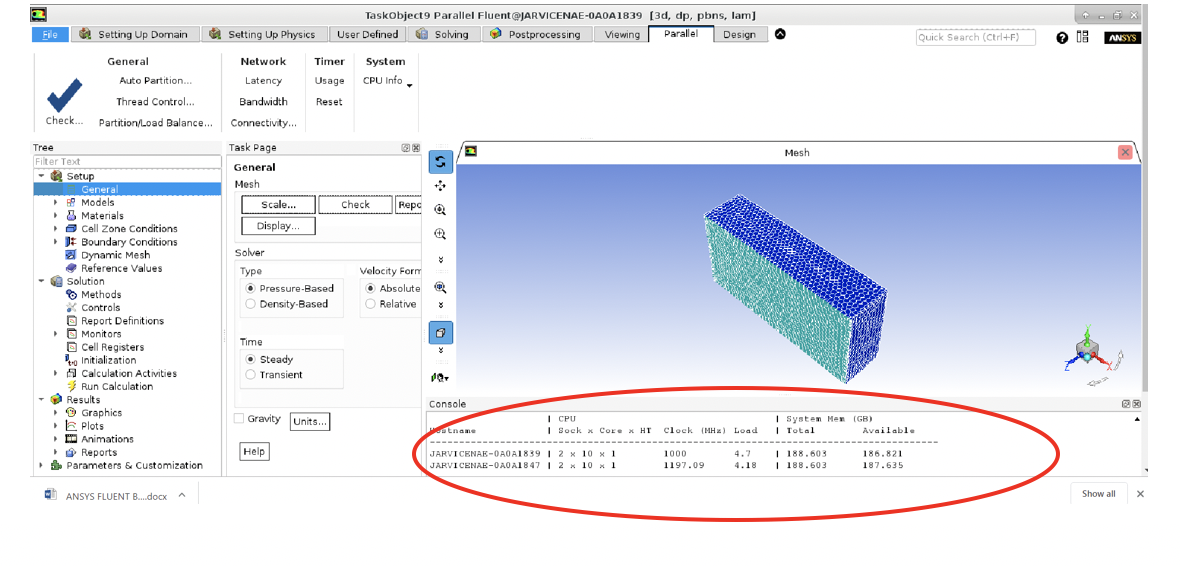
As seen in the circled region, the number of cores and partition (in this case, 2 nodes of 10 cores each, or a total of 40 cores is displayed in the Command Window) are displayed and the available RAM for each node.
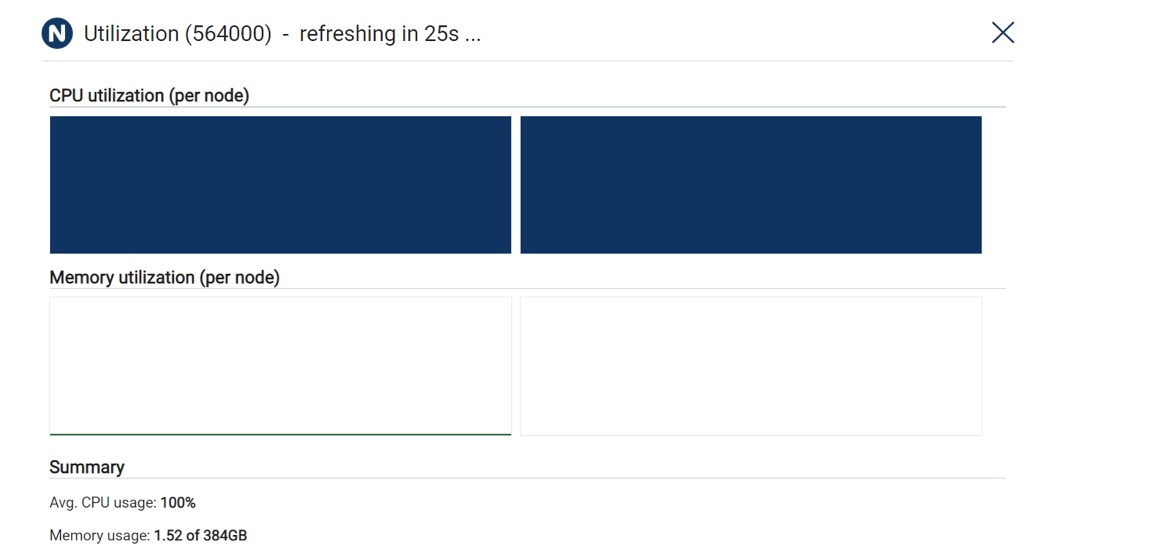
To check whether your job is running properly on the 40 cores (2 nodes), during the run, you can click the utilization button. The 2 nodes are used 100% during your Fluent run as reflected by the average CPU usage and the cores pictogram.