General Information
Browser Requirements
The Nimbix Cloud requires Internet Explorer 10 or later on Windows, as well as the latest versions of Chrome and Firefox on all platforms. While other browsers may work, please use a supported web browser to ensure the best experience possible.
Signing up for Service
You'll first need to request access by filling out this form. Once this is submitted, you will be contacted by our team to learn more about goals and get you set up with an account. Once you receive the invitation to the Nimbix Platform, click the link in the invite to complete the registration and create your account.
Logging into Nimbix Cloud
Once you’ve created your account, visit the Nimbix Cloud Login page to log in to your dashboard and start using the platform. If at any time you forget your password or would like to change it, simply click the Forgot Password? link at the bottom of the login page to reset it.
Uploading and Downloading Data
You can upload and download your data at any time whether you are running jobs or not. We have have a couple different ways to transfer data.
- Nimbix File Manager
- Secure FTP protocol (SFTP) using File Manager
We will go over using File Manager in this quick start guide. If you'd like to read more about using the SFTP method, please visit this article: How to Upload Data to JARVICE Using SFTP and File Manager Together.
In order to use the Nimbix File Manager, please follow the quick and easy steps below.
- Login to the portal at https://cloud.nimbix.net.
- Click “Compute” in the top navigation bar.
- Scroll down and click “JARVICE File Manager” app card.
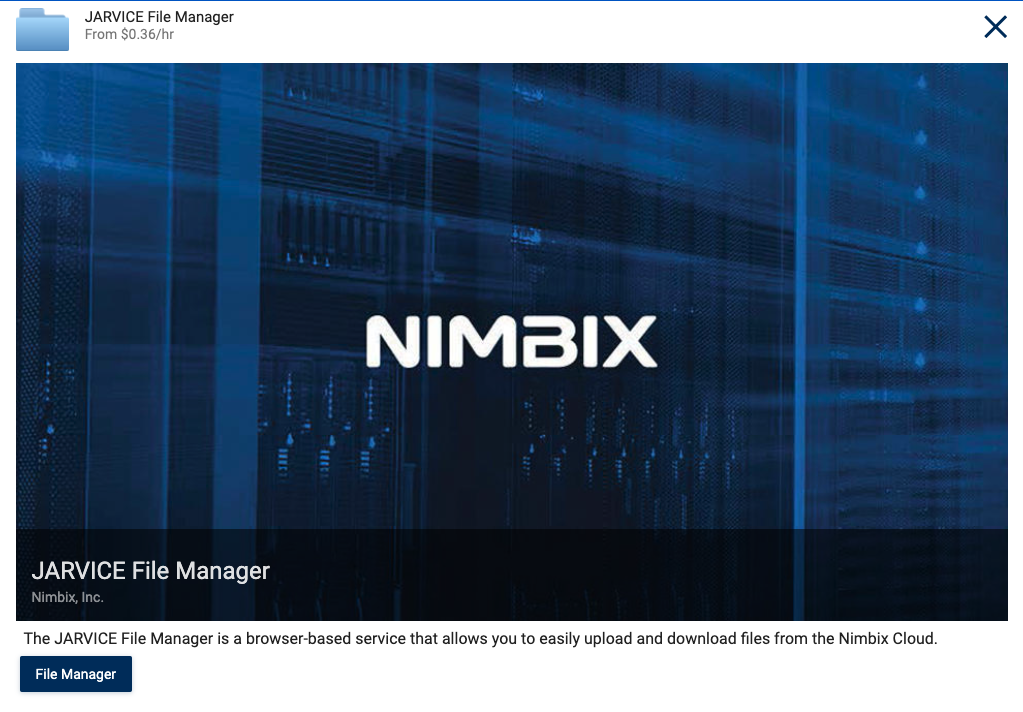
- This will expand the app card, click on “File Manager” in the bottom left corner.
- This will take you to a “Task Builder” screen. At this point, unless instructed otherwise, take all of the defaults, and click the green “Submit” button.
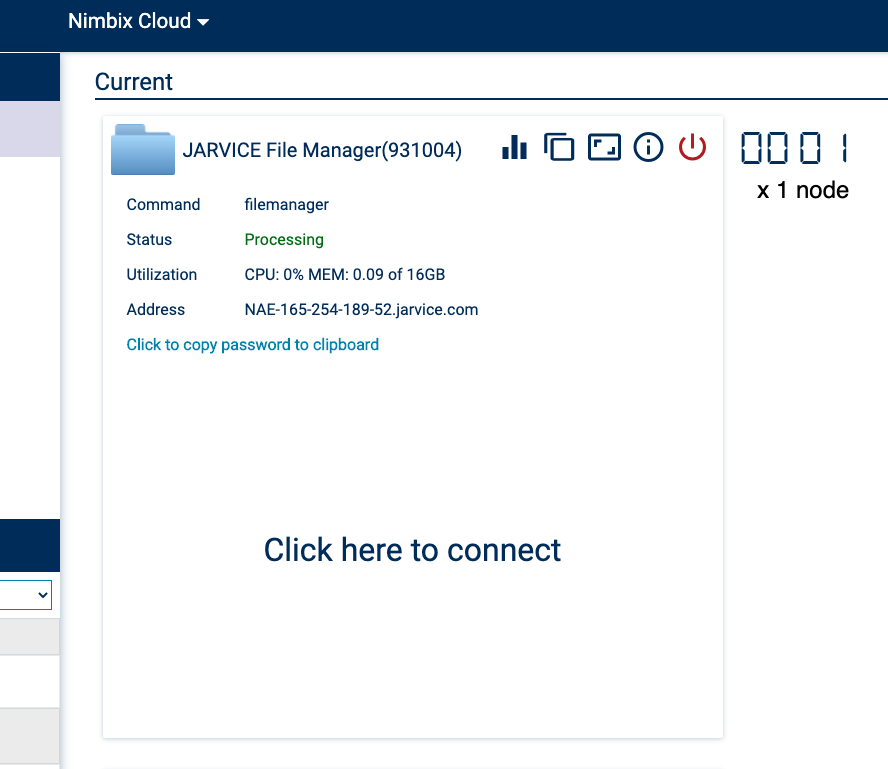
- You’ll be returned to your Dashboard. After a few seconds, you’ll see a new job titled “JARVICE File Manager: <job Number>”, click on "Click here to connect"
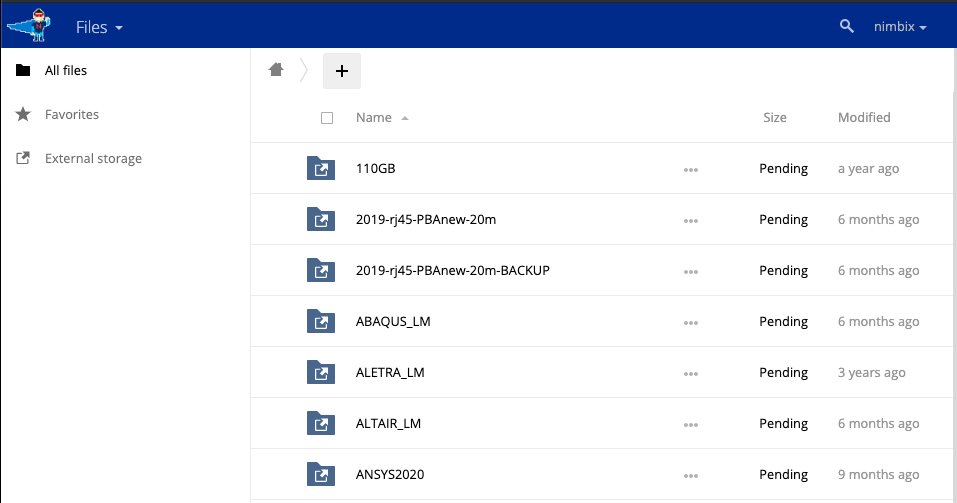
- At this point you should now see the content of your /data folder and be able to drag and drop files to and from your local machine.
Once you’re done moving data, go back to your Dashboard and shutdown your File Manager job.
Account Management and Inviting Users to your Team
There are several admin functions for managing your team. In this quick start guide, we'll just talk about inviting team members to your team. If you're interested in setting up team permissions, promote team members to admins, impersonate team members and more, please check this section of our help center: Account Management
Inviting Team Members
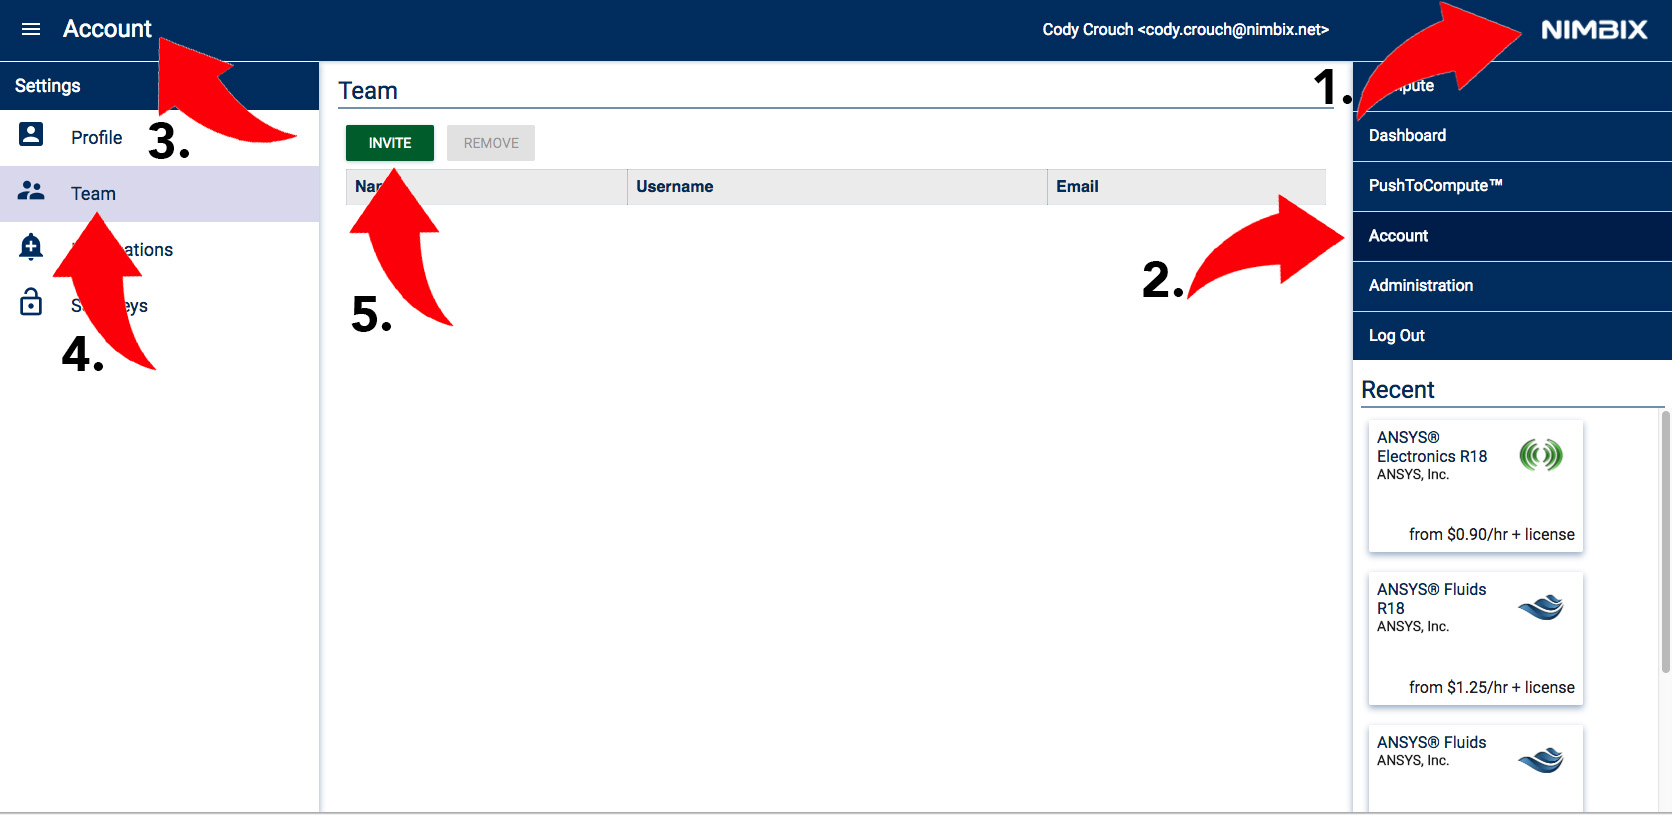
- Click "Nimbix" in the top right to expand the menu.
- Click "Account"
- Click "Account on the top left to expand the menu.
- Click "Team"
- Click "INVITE" and fill out the email and name of the user you want to invite.
Here's an image of these steps:
Once team members complete their registration, you can see team billing statistics on the dashboard, and run either summary or itemized billing reports showing activity for the entire team at any time.
Ready to run Workflows
Selecting Workflows or Applications
Nimbix is constantly updating our Hyper Hub with new workflows and applications, both free and commercial. Once you log into the portal, you can access this catalog of applications by clicking Compute at the very top right of the page next to Dashboard. Once there, you can sort by application category as well as applications that require leased licenses versus ones you can run on demand. For licensed applications, you should contact support@nimbix.net to connect your license server or key to your account.
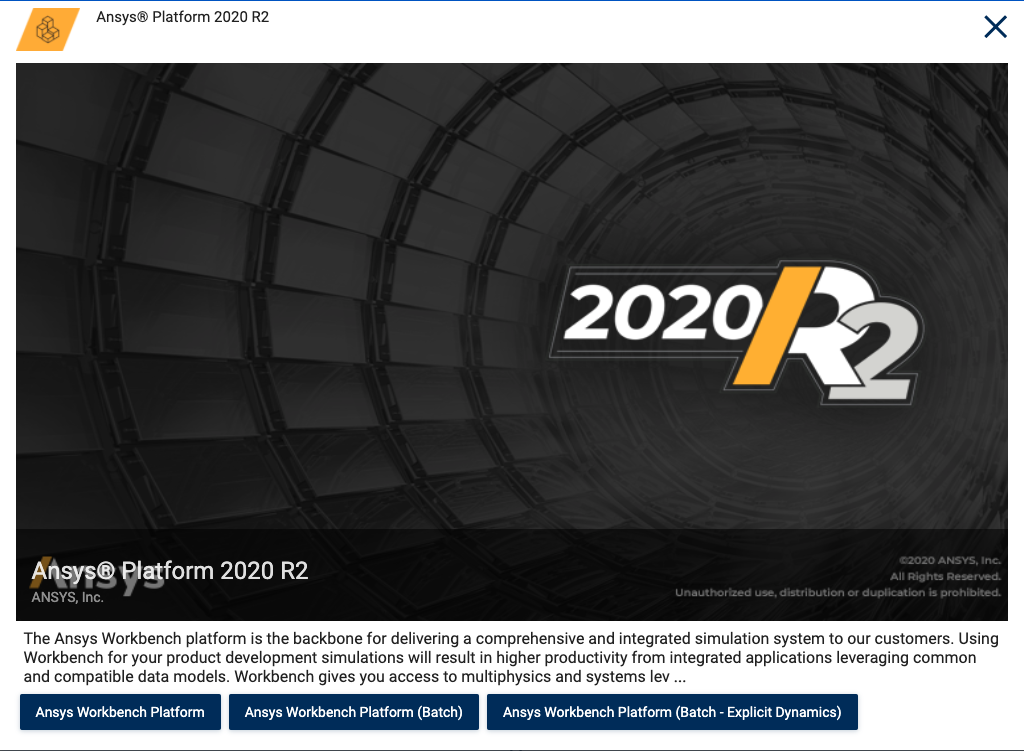
Clicking on an application will expand a menu of “commands”. Commands typically correspond to specific workflows. Here is an example below after click on the ANSYS Platform app card:
Once you click on the command you want to run, you’ll be brought to the Task Builder shown below.
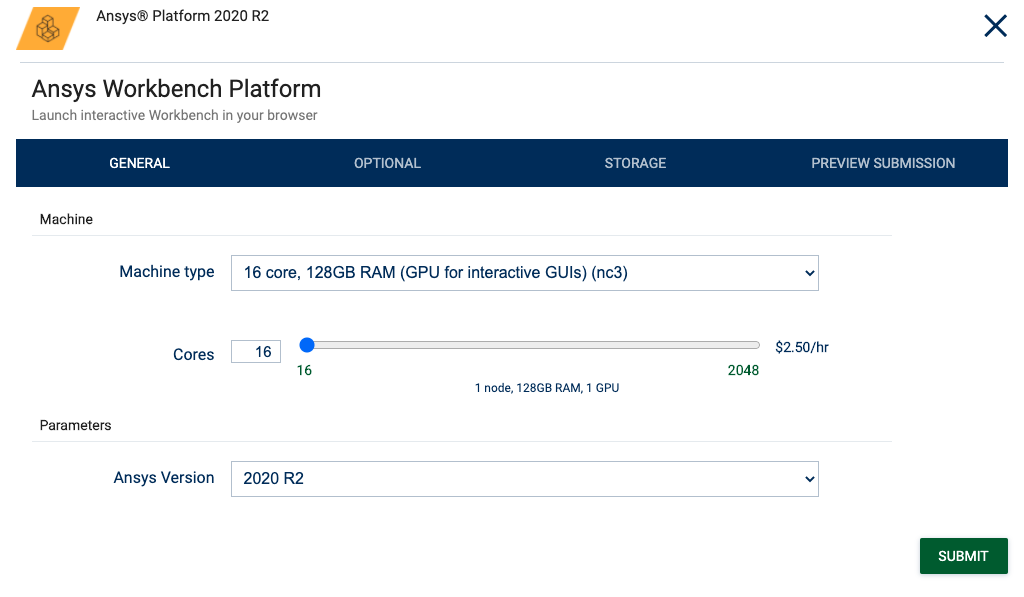
Here you will enter required and optional workflow-specific parameters including the number of cores you'd like to run on by clicking on the General, Optional, Storage, and Preview Submission tabs. If the workflow requires data, you will be able to select input file(s) from your storage vault directly in the Task Builder.
Submitting Jobs
Once you finish entering the required/optional parameters, click the green Submit button at the bottom of the page. If you'd like, you can check the API call in "Preview Submission" tab before you submit. Clicking Submit will bring you to your Dashboard where you will see your job start, along with all of your other running jobs, if you have any.
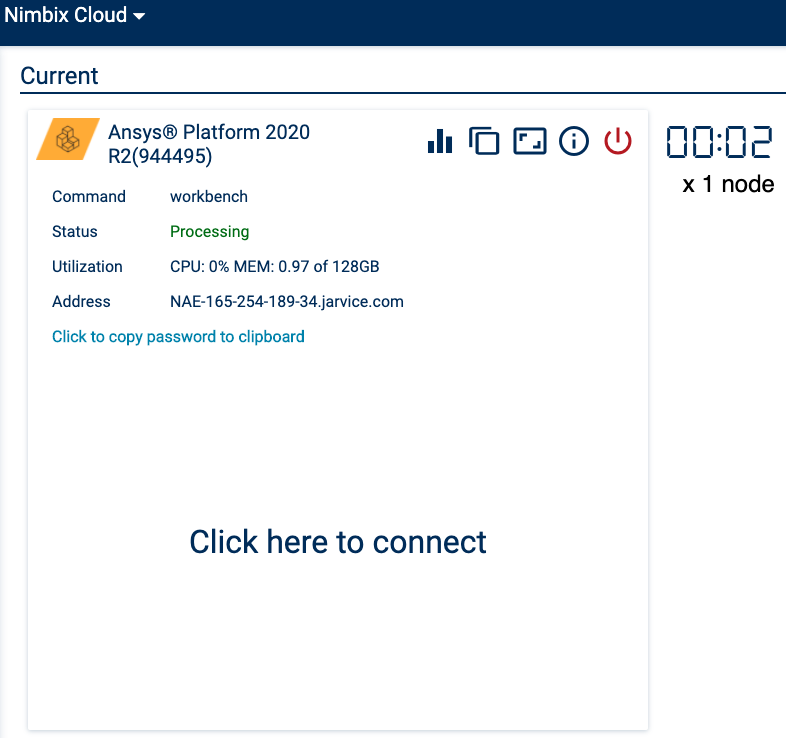
As shown above, your job will also have a Job Status. Here are the different job statuses and what they mean:
Starting: The job is allocating the resources needed to run the job.
Processing: The job is currently running and you can now connect to it
Queued: The job is waiting for the resources required in order to run the job. It will automatically start once those resources are available.
Billing does not start until the job moves to Processing state, so you are not billed while the job is either Queued or in the Starting phase.
Connecting to, Monitoring, and Controlling Jobs
Once a job is running (in Processing state), you can simply click on the blue "Click here to connect" and you will connect to the job directly inside the browser. If you'd like to connect via SSH or VNC you can click on the Information button (the "i" with a circle around it) on that particular job to get the information needed to do so. Here is some more information on connecting through SSH and VNC.
You can shut down jobs by clicking the red Power button on that job inside the Dashboard. Jobs will not shutdown when your processing is complete unless you are running a Batch job. Keep this in mind when running jobs to avoid unwanted costs.
Getting Additional Help or Providing Feedback
For additional help, please reach out to Nimbix Support by contacting support@nimbix.net at any time.
We are also delighted to hear your feedback on the quality of service, product features, and anything else you’d like to tell us. Please do not hesitate to contact us at any time and we’ll gladly take all your comments into consideration.
Thank you for choosing the Nimbix Cloud!